Custom Domains: Receiving Email with Your Own Domain
The old version of this documentation is available here.
The Custom Domain feature allows you to use CloudMailin to receive all email for your domain. With Custom Domains you can create a DNS entry in your own domain name to allow CloudMailin to accept all email on that domain and forward it onto your website just like your regular CloudMailin address.
Each of your CloudMailin addresses can have its own custom domain allowing you to use the feature for any number of websites and domains. You can also apply multiple custom domains to a single address if required.
Overview
Let's see an overview of the next steps:
- Warning: only one email server can be used
- Wildcards and Catch All addresses
- Selecting the Region
- Adding the MX records for your domain
- Setting up your CloudMailin address
We have a beta feature to allow sending different custom domains to a different HTTP endpoint. If you are interested in this feature, please let us know.
If you are in a hurry
- Skip to the MX records section if you don't want to read the full details.
- Setting up your CloudMailin address to setup your CloudMailin address to use the custom domain.
Custom domains require a paid plan at present.
Warning: only one email server can be used
Before we can add the MX records it's important to check that the domain is not already expecting email. You can do this by checking the MX records for your domain. As an example we can check using the host command on mac / linux:
host -t mx example.com
Due to the way that DNS systems work we cannot have multiple servers receiving for the same domain. Although adding the records will work we'll randomly see different servers receiving the email. If you already have MX records for your domain you either need to remove them to add CloudMailin as the only email server or you may need to use a subdomain for CloudMailin.
Wildcards and Catch All addresses
CloudMailin supports wildcards and catch all addresses.
Catch all email addresses and regular expressions
By default all custom domains are catch all addresses. This means that any email
addresses to @example.com will be received by CloudMailin. For example,
alice@example.com and bob@example.com will both be received by CloudMailin.
We highly recommend using a pattern for all of your email addresses. For example
customer-1@example.com, customer-2@example.com, etc. This allows your to
use regular expressions to block email addresses that you don't want to receive.
For example you could set the regular expression in the example above to:
\w+-\d+@example\.com
You can test using Rubular
This would match any email address that starts with one or more word characters and then a dash and then one or more digits.
Taking this approach allows you to block most SPAM attempts that will just try random email addresses on your domain.
Remember you should also use the HTTP status code to reject email that you don't want to receive too.
Wildcard custom domains
CloudMailin also supports a single level of wildcard custom domains. For example
if you have a custom domain of *.example.com then any email to
alice@client1.example.com or bob@client2.example.com will be received by
CloudMailin.
In order to set this up you will need to create wilcard DNS entry with your DNS provider (and they must support wildcards). Following this when you setup your domain in CloudMailin you will need to add *.example.com instead of example.com as the domain.
Selecting the Region
In order to add a custom domain we'll need to add MX records to your domain.
We used to allow adding CNAMEs too but this can cause issues with email being sent to cloudmailin.net rather than with your domain. You can still add a CNAME record as detailed here but we recommend using MX records instead.
CloudMailin has 3 clusters at present:
| Cluster | AWS Region | MX Record |
|---|---|---|
| US | us-east-1 | client1.cloudmailin.net |
| EU | eu-west-1 | client2.cloudmailin.net |
| AP | ap-southeast-2 | client3.cloudmailin.net |
By default the cloudmailin.net domain will use all three regions but will tailor the MX priority to the region of the DNS server making the request.
For example a DNS server in the US will see:
10 client1.cloudmailin.net
20 client2.cloudmailin.net
30 client3.cloudmailin.net
and a DNS server in Europe will see:
10 client2.cloudmailin.net
20 client1.cloudmailin.net
30 client3.cloudmailin.net
Each of these examples use a different priority for the client1 / client2 email clusters to prioritise the server in the region of the user.
(the records will be slightly different because we don't use the client prefix for cloudmailin.net)
Adding the MX records for your domain
When you come to set the DNS record for your own domain you'll need to either use geolocation or make a decision around which cluster to use.
Here we'll assume you want to setup the MX records at equal rate:
10 client1.cloudmailin.net
10 client2.cloudmailin.net
10 client3.cloudmailin.net
If your DNS provider requires a TTL then you can set this to what make sense for your setup but if you're going to play consider using a low TTL like 5 minutes.
Once you've added the MX records you'll need to wait for them to propogate and then setup your CloudMailin address to use the custom domain.
Setting up your CloudMailin address
Once you've added the MX records you'll need to wait for them to propogate and then setup your CloudMailin address to use the custom domain.
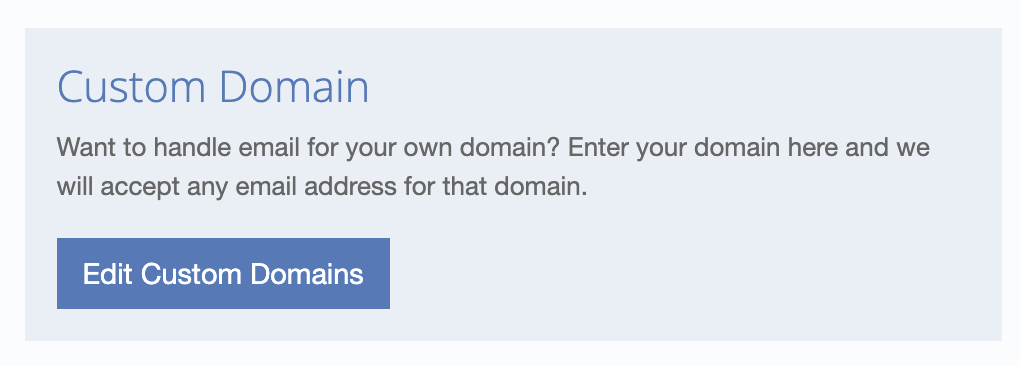
Once your MX records have propograted head to CloudMailin and open your address you should see an option to 'Edit Custom Domains'
Once you click this you'll see the following screen:
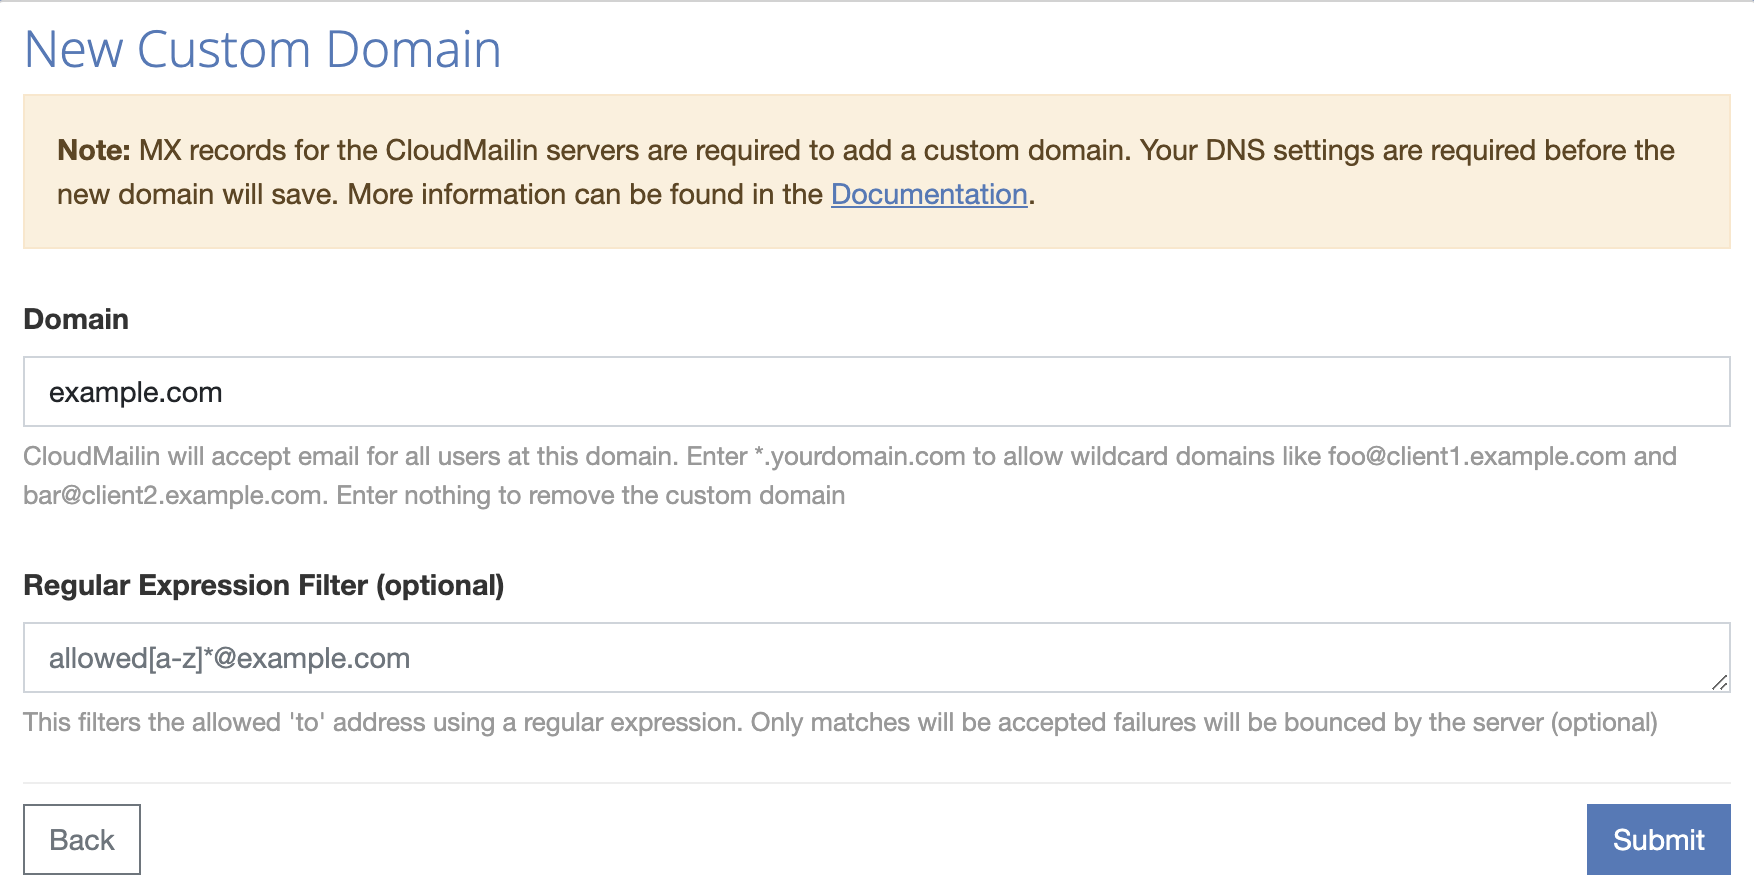
Clicking this will allow you to add your custom domain. CloudMailin will check that it can see the MX records and that the domain is valid. If everything is correct then you'll have successfully added your custom domain.
If you see an error message containing
regexpthen this is because the email did not meet the regular expression you set.
You should be all set to send email to your domain and have CloudMailin forward it onto your website via HTTP POST webhook.
As always if you have any questions or issues please contact us and we'll be happy to help.